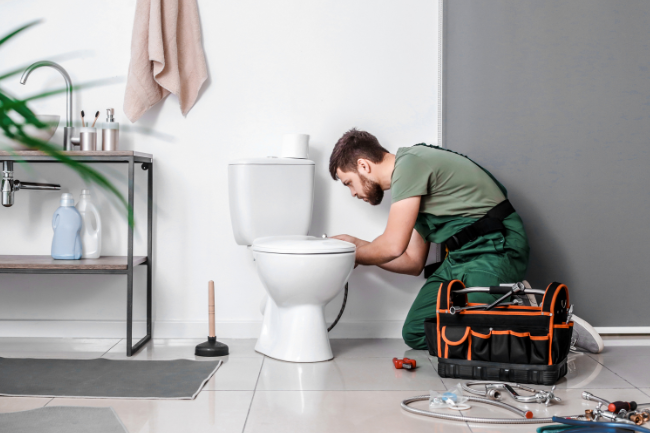
A toilet that keeps running can be frustrating and costly. Even a small continuous trickle of water can waste hundreds of gallons every month, driving up your water bill and putting unnecessary strain on your plumbing system. The good news is that most running toilet problems are easy to diagnose and repair without needing a plumber. By learning how to fix a running toilet, you can save money, conserve water, and prevent larger issues down the road. This guide will explain the common causes of a running toilet, the tools you will need, and step-by-step solutions for each issue.
Why Toilets Keep Running
Toilets are designed to flush waste using a combination of water pressure and gravity. When you press the handle, water stored in the tank flows into the bowl, carrying waste down the drain. Once the tank empties, a fill valve allows fresh water to flow back in while a flapper or seal closes the drain opening. If any of these parts fail to work properly, water may continue running instead of stopping when the tank is full. The most common culprits include a worn flapper, a faulty fill valve, an incorrectly adjusted float, or a problem with the overflow tube.
Tools and Supplies You Will Need
Before diving into how to fix a running toilet, gather a few simple supplies. Most repairs require only a basic tool kit and parts that are widely available at hardware stores. You may need: adjustable pliers, a sponge or towel to soak up water, replacement flappers, fill valves, or float assemblies, a utility knife, and a small bucket. Having these ready makes the process smoother and quicker.
Step 1: Identify the Source of the Problem
Start by removing the lid from the toilet tank and setting it aside carefully. Flush the toilet while watching the inside mechanisms. Observe the flapper at the bottom of the tank, the chain connected to the handle, the float that regulates water levels, and the fill valve that allows water into the tank. Most running toilet problems will be clear once you see which part is not functioning correctly.
Step 2: Check the Flapper
The flapper is a rubber or plastic seal at the base of the tank that lifts when you flush and then falls back into place to seal the opening. Over time, flappers can warp, crack, or build up mineral deposits that prevent a tight seal. To test the flapper, press down gently with your hand after the tank refills. If the water stops running when you press it, the flapper is the issue. To fix it, shut off the water supply by turning the valve near the base of the toilet clockwise. Drain the tank by holding down the flush lever. Disconnect the flapper from the chain and remove it from the overflow tube. Take the old flapper to the hardware store to ensure you buy the correct replacement. Install the new one by attaching it to the same mounting points and reconnecting the chain. Restore the water supply and test the flush. A new flapper often solves the problem instantly.
Step 3: Adjust the Chain
Sometimes the flapper itself is fine, but the chain connected to the flush handle is too short or too long. If the chain is too short, the flapper may not fully close. If it is too long, it may get caught under the flapper. Adjust the chain length so there is a slight slack when the flapper is closed, but enough tension to lift it when the handle is pressed. Test the toilet again to ensure proper closure.
Step 4: Inspect the Float
The float controls how much water fills the tank after each flush. If the float is set too high, water will continue flowing into the overflow tube, causing the toilet to run. If it is set too low, the toilet may not flush fully. Newer toilets use a plastic cup-style float that slides up and down the fill valve, while older ones may have a ball float attached to a rod. To fix a running toilet caused by float issues, adjust its height. For ball floats, bend the rod slightly downward to lower the water level. For cup floats, locate the adjustment screw on the fill valve and turn it clockwise to lower the float. The correct water level should be about one inch below the top of the overflow tube.
Step 5: Replace the Fill Valve
If adjusting the float does not work, the fill valve itself may be worn or malfunctioning. Fill valves regulate the water flow into the tank, and when they fail, water may continue running nonstop. To replace a fill valve, shut off the water supply and flush the toilet to empty the tank. Disconnect the water supply line from the bottom of the tank using pliers. Unscrew the lock nut holding the fill valve in place and lift it out. Insert the new fill valve following the manufacturer’s instructions. Adjust its height so that the top of the valve sits at least an inch above the overflow tube. Reconnect the water line, restore the water supply, and test the system.
Step 6: Check the Overflow Tube
The overflow tube prevents the tank from overflowing by channeling excess water into the bowl. If the water level is too high, it may continually drain into the tube, making the toilet run. Ensure the float and fill valve adjustments keep the water level below the top of the overflow tube. If the tube itself is cracked or damaged, you may need to replace it. This process usually involves removing the flush valve assembly, which can be more complex. In such cases, consider replacing the entire flush valve kit.
Step 7: Clean Mineral Deposits
Hard water can leave mineral deposits on toilet parts, especially the flapper and fill valve. These deposits may prevent seals from closing properly or cause valves to stick. If you notice buildup, scrub the affected parts with a sponge and vinegar. In some cases, soaking removable parts in vinegar overnight can restore functionality.
Preventive Maintenance Tips
Once you know how to fix a running toilet, you can also prevent future problems by performing occasional maintenance. Inspect the inside of the tank every few months to catch wear early. Clean away mineral deposits with vinegar to keep parts moving smoothly. Avoid using drop-in tank tablets with harsh chemicals that can degrade rubber parts quickly. Replace worn parts promptly instead of waiting for complete failure. By being proactive, you extend the life of your toilet and keep water bills under control.
When to Call a Plumber
Most running toilet issues can be fixed with simple adjustments or inexpensive replacement parts. However, if you try these steps and the toilet still runs, or if you encounter cracks in the porcelain tank, it is time to call a professional plumber. Persistent issues could indicate hidden leaks, high water pressure problems, or more complex plumbing defects that require specialized tools.
Environmental and Financial Benefits
Learning how to fix a running toilet is not just about convenience. A single running toilet can waste more than 200 gallons of water per day, which adds up quickly on your monthly bill. Repairing it saves you money and conserves water, an increasingly important resource. Over time, simple DIY toilet repairs can pay for themselves many times over, making them one of the most cost-effective home maintenance tasks.
Final Thoughts
A toilet that keeps running is more than just an annoyance. It is a sign that something inside the tank is not functioning as it should. Thankfully, most solutions are quick and affordable once you know where to look. Whether it is a faulty flapper, a misaligned float, or a worn-out fill valve, the steps outlined above give you the confidence to diagnose and solve the problem. By following this guide on how to fix a running toilet, you will restore proper function, save water, and enjoy peace of mind knowing your bathroom is working efficiently.


