Turning a simple photo into a 3D printable STL file used to require advanced modeling skills, hours of sculpting, and complicated software. Today, AI-powered tools have changed everything. Whether you’re a hobbyist, maker, game developer, or professional designer, you can now convert images or text into ready-to-print 3D models in minutes.
If you’ve ever asked, How do I turn a photo into a 3D printable STL this guide walks you through the entire process step-by-step — from photo to printable model.
What Is an STL File?
Before we dive in, let’s clarify the basics.
An STL (Stereolithography) file is the standard format used by most 3D printers. It defines:
- Geometry of the object
- Surface mesh (triangles)
- Printable shape
It doesn’t include color or textures — just the structure needed for printing.
So the goal is simple:
Convert your 2D photo → generate 3D geometry → export as STL → print.
Traditional vs AI-Based Methods
Old Way (Manual)
Previously, you had to:
- Sculpt in Blender/ZBrush
- Manually trace shapes
- Fix topology
- Clean meshes
- Export STL
This could take hours or even days.
Modern Way (AI Powered)
Now, platforms use AI to:
- Understand image depth
- Generate 3D geometry automatically
- Create clean meshes
- Optimize for printing
- Export STL instantly
Much faster and beginner-friendly.
Step-by-Step: Turn a Photo into an STL
Step 1: Choose a Clear Photo
The better the photo, the better the model.
Tips:
- Good lighting
- Simple background
- Clear edges
- Front or multiple angles
Examples:
- Toys
- Figurines
- Tools
- Props
- Miniatures
- Products
Avoid:
- Blurry images
- Heavy shadows
- Complex cluttered scenes
Step 2: Upload the Image to an AI 3D Generator
Use an AI-based tool like 3DAI Studio that can:
✔ Convert photos or text into 3D
✔ Automatically generate PBR textures
✔ Remesh and clean topology
✔ Optimize for printing
✔ Export STL directly
Simply:
- Upload your image
- Select “Generate 3D”
- Let AI create the model
Processing usually takes seconds to minutes.
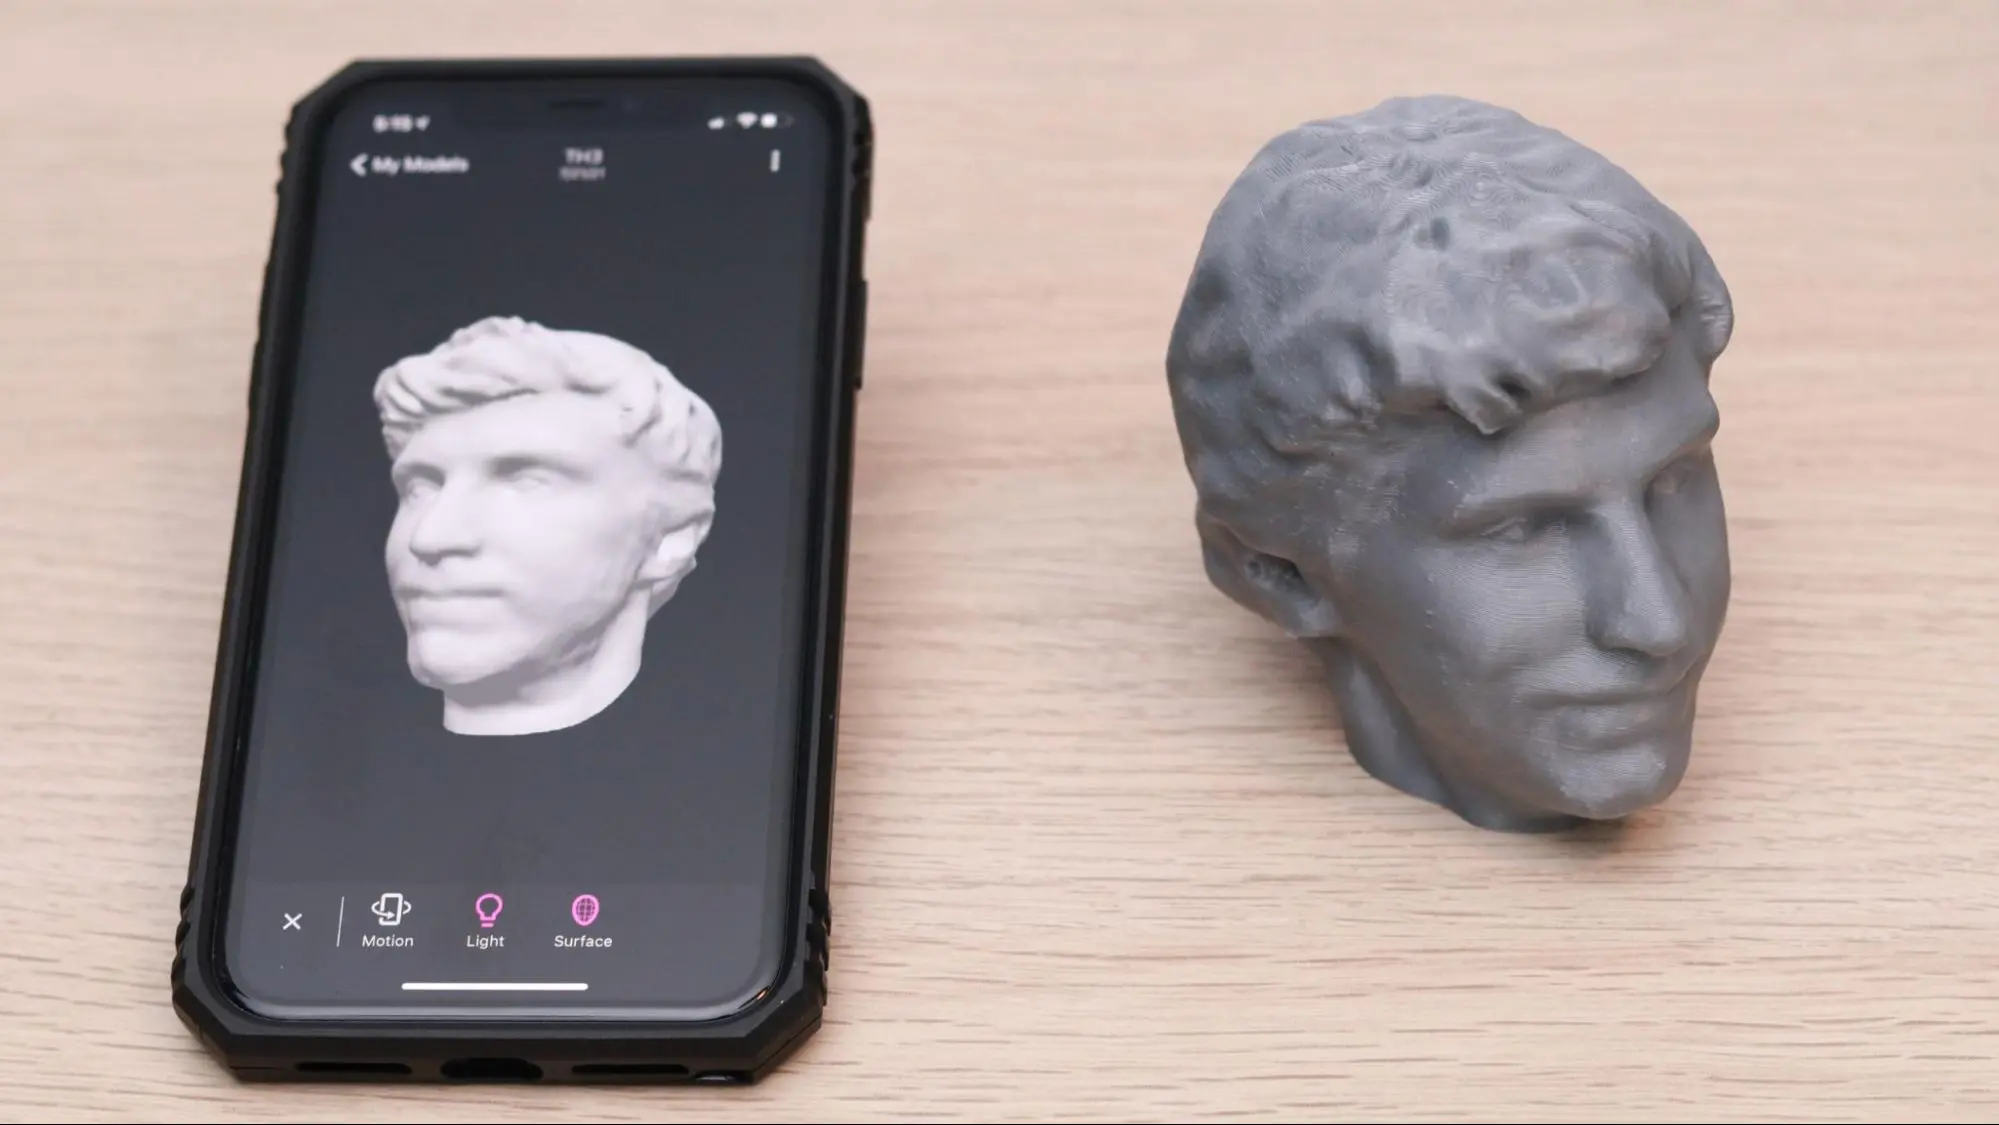
Step 3: Auto Mesh Generation
After upload, the system:
- Detects object shape
- Estimates depth
- Creates a 3D mesh
- Fills missing geometry
You’ll get a full 3D model that you can rotate and inspect.
This replaces hours of manual modeling.
Step 4: Optimize the Model for Printing
For 3D printing, your mesh must be:
✔ Watertight (no holes)
✔ Manifold
✔ Clean topology
✔ Correct thickness
✔ Proper scale
Modern AI tools automatically:
- Remesh
- Fix broken geometry
- Reduce poly count
- Remove artifacts
This step is critical — messy meshes often fail during slicing.
Step 5: Export as STL
Once the model looks good:
- Click Export
- Choose STL format
- Download the file
That’s your 3D printable model ready to go.
Step 6: Slice & Print
Open your STL in slicing software like:
- Cura
- PrusaSlicer
- Bambu Studio
Then:
- Set scale
- Add supports
- Choose infill
- Slice
Done!
Pro Tips for Better Results
Use Multiple Angles
If possible, upload:
- Front
- Side
- Back views
This improves depth accuracy.
Add Thickness
Thin surfaces may break while printing. Add wall thickness when editing.
Simplify Complex Shapes
Too many tiny details may not print well. Keep designs practical.
Test Small First
Print a small version before full size to save time and filament.
Who Benefits from Photo-to-STL Conversion?
This workflow is perfect for:
Makers
Turn real objects into printable replicas.
Game Developers
Quickly create props and assets.
3D Artists
Prototype models fast.
Educators
Create teaching models from images.
Product Designers
Test concepts instantly.
Why AI Tools Save Massive Time
Here’s a quick comparison:
Manual modeling: 4–8 hours
AI conversion: 2–5 minutes
That’s up to 100x faster.
Plus:
- No advanced skills needed
- No sculpting knowledge required
- Beginner friendly
Common Questions
Can any photo be converted?
Most objects work, but flat or extremely complex shapes may need adjustments.
Do I need modeling skills?
No. AI handles most of the work.
Is the STL editable?
Yes, you can edit in Blender, Meshmixer, or other 3D software.
Can I use it for commercial projects?
Depends on the platform license — always check terms.
Final Thoughts
If you’ve been wondering “How do I turn a photo into a 3D printable STL?”, the answer is simpler than ever:
- Upload photo
- Generate 3D
- Clean mesh
- Export STL
AI has removed the technical barriers and made 3D creation accessible to everyone.
Instead of spending hours modeling from scratch, you can now focus on creativity and production.
If you regularly create assets for printing, games, or design, using an AI-based generator can completely transform your workflow.