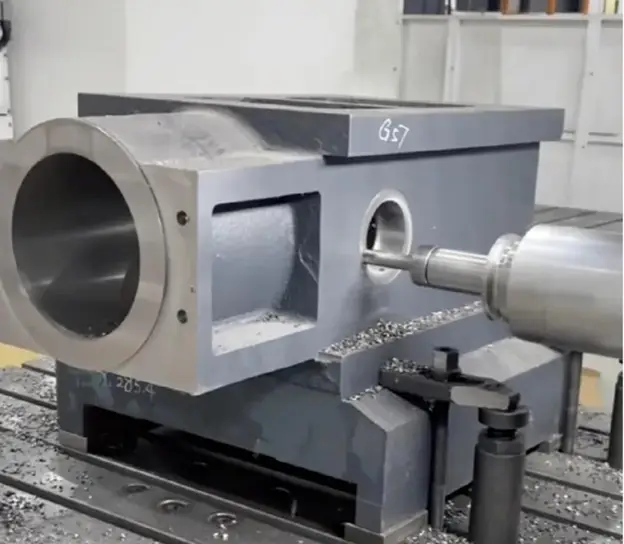
Processing heavy steel sheets and big structural pieces calls for dedicated tools that can manage intense cutting pressures, broad sizes, and quick material removal while keeping accuracy. Sectors like aerospace, rail, building gear, and power heavy building depend on CNC devices built for these tough jobs.
We will offer actual vendor contrasts to aid you in picking the right CNC machinery for your workshop.
Why Machining Thick Steel Plates and Large Structural Parts Is Challenging
Steel is thick and hard. Heavy sheets create strong cutting forces. These forces require:
·Solid strength and frame firmness
·Powerful spindle strength and turning force
·Big movement ranges and weight handling
·Good chip removal and cooling
·Accuracy in all processing steps
Regular devices often miss the strength and power. Choosing tools made just for tough sheet processing ensures better work speed, exactness, and longer cutting tool use.
What Machines Are Used for Machining Thick Steel Plates
What tools work well for processing heavy steel sheets? Good processing of heavy steel sheets usually uses these kinds of devices:
| Machine Type | Key Features | Typical Applications | ASIATOOLS Special Features |
| Heavy-Duty Horizontal Machining Centers (HMCs) | Great strength and turning force for tough milling, Better chip removal thanks to side spindle setup, Extended movement areas for big sheet sizes, Automation fit for more output | Tough milling, Deep slotting, Big sheet processing | ASIATOOLS H Series: Stronger overhead frames, paired tracks, high-turning force gear spindles for steady work in tough cuts. |
| Heavy-Duty Vertical Machining Centers (VMCs) | Tough builds and strengthened spindles, Upward entry for simple setup, High exactness in upward processing | Surface smoothing, Exact hole drilling, Follow-up processing after rough work | High exactness processing with steady build for sheet smoothing. |
| CNC Duplex Milling Machines | Paired heads or double work surfaces, Great for multi-side milling, Cuts down time by working on several sides at once | Multi-face milling, Block processing | ASIATOOLS Duplex Milling Machines: Quick 4-side processing for blocks, high exactness. |
| CNC Surface Grinding Machines | Reaches tiny-level evenness, Perfect for top exactness surface smoothing, Fits big sheets | Surface smoothing, Top exactness sheet leveling | ASIATOOLS Surface Grinders: High-weight grinding with better evenness and surface finish. |
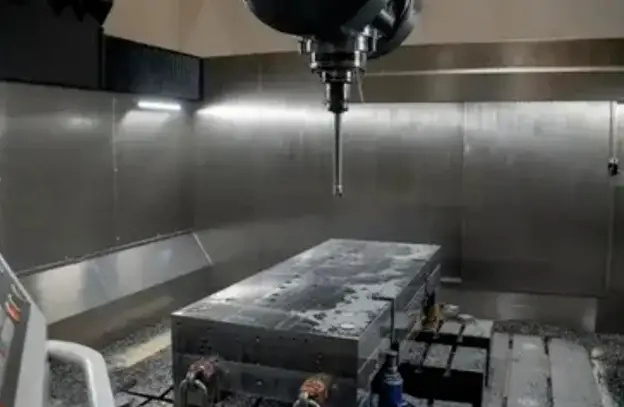
Which CNC Machines Are Suitable for Heavy–Duty Cutting?
Tough cutting needs devices with:
·Strong spindle strength (high kW level)
·Firm frame build to fight bending
·High-weight straight tracks and ball screws
·Cooling setups that aid deep rough work
The best device kinds include:
·Tough horizontal machining centers
·Floor-type milling devices
·Gantry-type milling centers for very big pieces
Among vendors of such gear, ASIATOOLS’ devices shine for even strength, firmness, and lasting dependability.
Supplier Comparison: Heavy–Duty CNC Machines for Thick Steel Plates
The next table shows how main vendors’ devices stack up during tough processing on heavy sheets:
| Supplier | Machine Model | Work Envelope (XYZ mm) | Max Load (kg) | Spindle Power (kW) | Best Strength |
| ASIATOOLS | HMC-210 | 2100×1600×1000 | 8000 | 45 | Superior rigidity and torque for thick steel |
| Tation Equipment | Titan-1800 | 1800×1400×900 | 6000 | 35 | Strong cutting, but less rigidity than ASIATOOLS |
| Foch Systems | FT-1500 | 1500×1200×800 | 5000 | 30 | Lower cost, suitable for medium plates |
Why ASIATOOLS Leads:
· The HMC-210 gives the top spindle strength and weight handling. These are key for quick removal rates on heavy sheets.
· Strengthened building design cuts down on shaking and bending. It keeps good surface finish even during deep cuts.
· Modern control setups hold steady speeds and feeds under pressure. This matters for work output and cutting tool life.
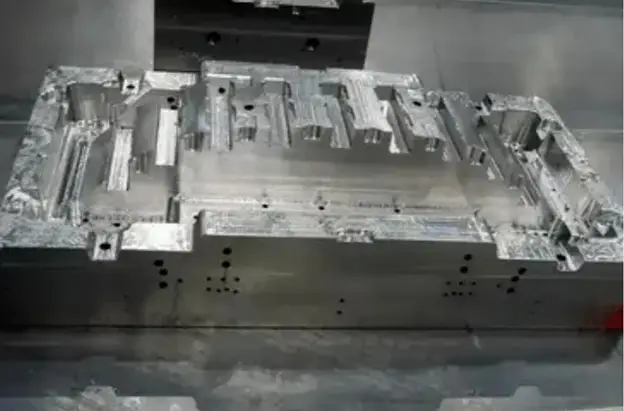
Which Equipment is Recommended for Large Structural Parts?
Big structural items—such as gear frames, building supports, aerospace holders—often need very wide work areas and multi-axis processing skills.
Suggested gear kinds:
| Equipment Type | Key Features | Benefits |
| Floor-Type Heavy Machining Centers | Big surfaces with heavy build support, Fits long movement distances, Automation joining for high output | Lets you process big items, Handles tough cuts with steadiness, Perfect for high-making settings |
| Gantry Machining Centers | Very wide movement in every direction, Solid head part and bridge setup- 4-axis or 5-axis skill for tricky shapes | High exactness for big items, Perfect for tough cuts, Fits complex structural processing |
| Integrated Multi-Axis Milling | Multi-axis skill, Less hand moving, Keeps steady exactness for tricky surfaces | Perfect for very tricky surfaces, Cuts setup time and boosts processing accuracy |
Which Machines Are Best for Large Structural Parts?
Here is a vendor contrast aimed at big structural piece processing:
| Supplier | Machine | Travel Range | Load Capacity (kg) | MultiAxis Capability | Key Advantage |
| ASIATOOLS | SMC-5000 Gantry | 5000×3000×1500 | 20000 | 5-axis | Exceptional for large structures with complex geometry |
| Prue Tech | PST-4000 | 4000×2500×1200 | 15000 | 4-axis | Large envelope but fewer axes |
| Foch Systems | FT-3500 | 3500×2200×1000 | 12000 | 3+1 | Cost-effective large mill |
Advantages of ASIATOOLS SMC-5000 Gantry:
·Huge movement range and weight handling eases processing of very big parts.
·5-axis skill cuts setup and boosts the exactness of the shape.
·Strengthened side beam and support build lowers shaking for quick tough cutting.
Best Practices for Machining Thick Steel Plates and Large Structural Parts
1. Prioritize Rigidity First
Big loads and deep cuts require bending if strength is lacking. Pick devices with strengthened frames, broad tracks, and solid spindle parts.
2. Torque and Spindle Power Matter
In tough steel processing, spindle strength right away affects cutting speed and tool life. Bigger kW and Nm levels give better results.
3. Focus on Tool Path and Cooling
Best tool paths cut processing time and heat rise. Right cooling improves chip removal and tool life.
4. Consider Automation
For group processing of big parts or sheets, tray changers and automation setups greatly raise output and cut wait time.
5. Supplier Support and Service
Good after-sales help affects running time. Nearby aid for starting up, routine upkeep, and spare parts is vital for lasting work output.
In conclusion, ASIATOOLS provides robust, high-performance CNC machines that deliver exceptional results for both thick steel plate machining and the processing of large structural components. With their reinforced design, advanced spindle technology, and multi-axis capabilities, ASIATOOLS machines offer significant advantages in terms of efficiency, precision, and reliability.
Frequently Asked Questions
What machines are used for machining thick steel plates?
Heavy horizontal machining centers, strengthened vertical machining centers, CNC duplex mills, and surface grinding machines are typically used. Horizontal machines with strong torque and large travel excel in primary roughing of thick steel plates.
Which CNC machines are suitable for heavyduty cutting?
Machines with high spindle power, robust frames, and large guideways—such as heavy-duty horizontal machining centers and floor-type mills—are best suited for heavy-duty cutting operations.
Which machines are suitable for machining thick steel plates?
Horizontal machining centers with reinforced construction and high-power spindles are among the most suitable. They handle heavy cuts, deep pocketing, and plate profiling efficiently.
Which equipment is recommended for large structural parts?
For large structural parts, floor-type machining centers and gantry machines with extra-large travel ranges and load capacities are recommended. Multi-axis capability also improves precision on complex geometries.
Which machines are best for large structural parts?
The best machines combine high load capacity, large travel, and multi-axis control. Gantry centers like the ASIATOOLS SMC-5000 Gantry deliver outstanding performance in this category.