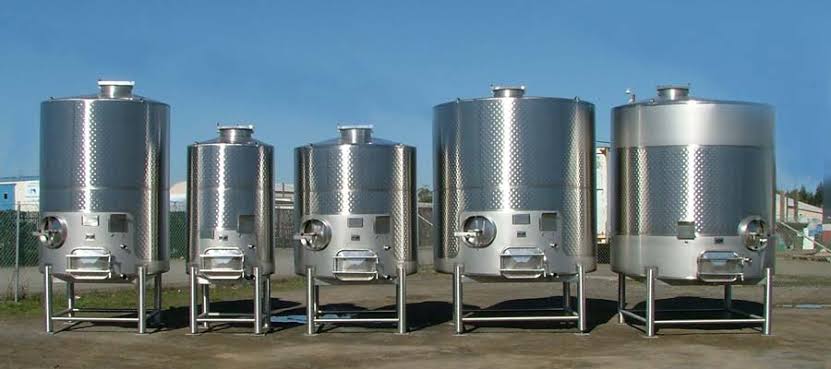
Replacing parts in a steel tank can seem daunting, but it doesn’t have to be. Whether it’s for maintenance, repair, or upgrading, knowing the right steps can make the process straightforward and efficient. Proper replacement ensures the tank continues to function optimally, preventing potential issues like leaks, contamination, and structural failures.
This guide will walk you through ten easy steps to replace steel tank parts, ensuring your tank remains in top condition. Along the way, we’ll address common questions and provide tips for a smooth replacement process.
1. Assess the Condition of the Tank
Before starting the replacement process, thoroughly assess the condition of the tank. Look for signs of wear, corrosion, leaks, and any other issues that might affect its performance. This initial assessment helps determine which parts need replacing and prevents unnecessary work. Pay close attention to commonly problematic areas like joints, seals, and welded connections.
2. Identify the Parts to be Replaced
Make a detailed list of the parts that require replacement. This could include valves, seals, gaskets, nozzles, or even larger components like the tank bottom or manways. Having a comprehensive list ensures you don’t miss any critical components during the replacement process. If you’re unsure about which parts are needed, consulting with a professional can help.
3. Obtain the Replacement Parts
Purchase high-quality replacement parts from a reliable supplier. For stainless steel tanks, it’s crucial to get parts that match the specifications and standards of your original components. Consider using Stainless Steel Tank Replacement Parts for guaranteed compatibility and durability. Using certified parts reduces the risk of future issues and ensures the longevity of your tank.
4. Prepare the Necessary Tools and Equipment
Gather all the tools and equipment required for the replacement process. This may include wrenches, screwdrivers, torque wrenches, sealant, safety gear, and any specialized tools specific to your tank model. Having everything ready before starting the work helps in smooth and uninterrupted replacement.
5. Drain and Clean the Tank
Before replacing any parts, ensure the tank is completely drained and thoroughly cleaned. Residual contents can cause contamination and make the replacement process messy and unsafe. Use appropriate cleaning agents and methods to ensure the tank is spotless. Proper cleaning also allows for better inspection and identification of any additional issues.
6. Remove the Old Parts
Carefully remove the parts that need replacing. Follow the manufacturer’s guidelines for disassembly to avoid damaging other components. Use appropriate tools and techniques to loosen and remove parts like valves, gaskets, and seals. If you encounter any resistance or difficulty, double-check to ensure all bolts and connections are properly loosened.
7. Inspect the Replacement Parts
Before installing the new parts, inspect them for any defects or damage. Ensure they are the correct size and type for your tank. This step is crucial as installing a faulty part can lead to further issues down the line. If you find any defects, contact your supplier for a replacement.
8. Install the New Parts
Carefully install the new parts, following the manufacturer’s instructions. Use the appropriate sealants and gaskets to ensure a tight and leak-free fit. Tighten all bolts and connections to the recommended torque settings. Proper installation is key to the performance and longevity of the tank.
9. Test for Leaks and Functionality
After installing the new parts, test the tank for leaks and proper functionality. Fill the tank with water and check all connections and seals for any signs of leakage. Operate any valves and other components to ensure they are working correctly. Performing these tests before returning the tank to service helps identify and address any issues immediately.
10. Document the Replacement Process
Maintain detailed records of the replacement process, including the parts used, dates, and any observations. This documentation is valuable for future maintenance and inspections. It helps track the tank’s history and can assist in troubleshooting any future issues. Proper record-keeping also ensures compliance with any regulatory requirements.
FAQs about Replacing Steel Tank Parts
How often should steel tank parts be replaced?
The frequency of replacing steel tank parts depends on factors like the tank’s usage, the type of contents stored, and environmental conditions. Regular inspections can help determine when parts need replacement, typically every few years or as recommended by the manufacturer.
Can I replace steel tank parts myself, or should I hire a professional?
While some parts can be replaced by a knowledgeable individual, hiring a professional ensures the job is done correctly and safely. Professionals have the expertise and tools to handle complex replacements and can identify potential issues that might be overlooked.
What are the signs that a steel tank part needs to be replaced?
Common signs include leaks, corrosion, unusual noises, and decreased performance. Regular inspections help identify these signs early, preventing more significant issues. If you notice any of these signs, it’s crucial to address them promptly.
Why is it important to use certified replacement parts?
Certified replacement parts meet industry standards and specifications, ensuring compatibility and durability. Using non-certified parts can lead to premature failures, safety risks, and void warranties. Always opt for high-quality, certified parts for reliable performance.
Conclusion
Replacing steel tank parts is a crucial maintenance task that ensures the longevity and functionality of your tank. By following these ten easy steps, you can efficiently replace the necessary components and maintain your tank’s performance. From assessing the tank’s condition to documenting the replacement process, each step is vital for a successful outcome.
Regular maintenance and timely replacements not only prevent costly repairs but also ensure the safety and efficiency of your operations. For high-quality replacement parts and professional guidance, consider Stainless Steel Tank Replacement Parts to keep your tank in optimal condition.
Technology Perspective
Technology continues to transform industries through artificial intelligence, cloud computing, automation, cybersecurity, digital platforms, and data-driven decision making. As organizations increasingly adopt digital solutions, understanding emerging technologies becomes essential for businesses, professionals, and consumers. DGM News regularly covers these developments through expert analysis, technology news, and educational resources.
Innovation Outlook
Rapid advances in artificial intelligence, automation, machine learning, cloud infrastructure, and digital transformation continue reshaping global industries. Monitoring these developments helps organizations adapt to changing technologies, improve efficiency, and prepare for future innovation.
Did you know?
Artificial Intelligence is expected to influence nearly every major industry over the coming decade, from healthcare and finance to transportation, manufacturing, education, and entertainment.
AI, Machine Learning, Deep Learning and Generative AI Explained
Google AI Updates
About DGM News
DGM News is an independent digital publication delivering the latest Technology News, AI News, and FinTech News. We provide expert insights on startups, innovation, cybersecurity, software, business, gadgets, cloud computing, artificial intelligence, and emerging technologies. Our mission is to publish informative, accurate, and regularly updated content that helps readers stay informed in today's rapidly evolving digital landscape.
Since our editorial focus includes technology, artificial intelligence, and financial technology, we continuously expand our coverage as new innovations emerge.
Editorial Standards
Every article published on DGM News undergoes editorial review before publication. We prioritize factual accuracy, clarity, transparency, and reader value while following responsible digital publishing practices.
Research Methodology
Our editorial team researches publicly available information from official announcements, technical documentation, research publications, developer resources, reputable industry reports, and trusted public sources whenever applicable. Information is reviewed to improve clarity and accuracy before publication.
Fact-Checking Policy
We make reasonable efforts to verify factual information before publishing. Articles are reviewed for accuracy, consistency, and relevance. If significant developments occur after publication, content may be revised to reflect updated information.
Update Policy
Technology evolves rapidly. Articles may be reviewed and updated periodically to reflect software releases, AI developments, security advisories, regulatory updates, product launches, and other important industry changes.
Source Verification
Whenever possible, DGM News reviews information using official company announcements, technical documentation, research publications, government resources, publicly available reports, and reputable industry references before updating articles.
Editorial Independence
DGM News maintains editorial independence in all publishing decisions. Editorial content is produced independently and is intended to provide balanced, informative, and reader-focused coverage without influence from advertisers or commercial partnerships.
AI Usage Disclosure
Artificial intelligence tools may assist with research organization, grammar improvement, formatting, or editorial workflows. Every article is reviewed by human editors before publication to help maintain quality, clarity, and factual accuracy.
Corrections Policy
Accuracy is important to us. If readers identify outdated information or factual inaccuracies, they are encouraged to contact our editorial team. Verified corrections are reviewed and incorporated whenever appropriate.
Reader Feedback
Reader feedback helps improve our journalism. We welcome suggestions, corrections, and constructive feedback through our Contact page to continuously improve the quality of our reporting.
Last Editorial Review
This article follows the DGM News editorial review process and may be updated periodically as new information becomes available.
Why Trust DGM News?
DGM News is committed to publishing technology journalism that emphasizes accuracy, transparency, editorial independence, and regularly updated information. Our editorial process is designed to provide readers with reliable coverage of technology, AI, fintech, startups, and digital innovation.
DGM News Resources
Topics We Cover
Artificial Intelligence • AI Tools • Machine Learning • FinTech • Cybersecurity • Cloud Computing • Programming • Software Development • Gadgets • Mobile Technology • Business Technology • Startups • Digital Marketing • Blockchain • Cryptocurrency • Science • Innovation • Consumer Technology • Enterprise Technology • Automation
