Installing laminate flooring on uneven subfloors can seem tricky, but it’s totally doable with the right approach. If your subfloor isn’t perfectly flat, you might face problems like gaps or squeaky floors. Don’t worry! We’re here to guide you through each step of the process, says SGI Property Management Phoenix team.
With just a few simple tools and techniques, you can level your subfloor and install your laminate flooring like a pro. Follow our easy guide to ensure a smooth, durable, and beautiful finish that’ll last for years.
Understanding the Challenges of Uneven Subfloors

Uneven subfloors can make installing laminate flooring much harder than it needs to be. Whether it’s from years of wear, moisture damage, or settling, an uneven subfloor can lead to all sorts of issues. But don’t worry, understanding the challenges you face is the first step toward fixing them.
When the subfloor is uneven, the laminate flooring might not sit properly, causing gaps or even cracks in the surface. These gaps can lead to movement in the floor, which could eventually cause your laminate to warp or become loose. Also, uneven subfloors can create squeaky or bouncy spots, which can be really annoying to live with.
Preparing the Subfloor: Cleaning and Assessment
Before you can install your laminate flooring, it’s important to prepare your subfloor. Proper cleaning and assessment are key to ensuring that the laminate will sit evenly and securely. This step will help you avoid problems later on, like gaps, squeaks, or even damage to your new floor.
Step 1: Remove Old Flooring and Debris
Start by taking up any old flooring, including carpet, tile, or vinyl. Check for any nails, staples, or adhesive left behind. These can cause bumps or unevenness, making it harder for your laminate to settle properly.
Use a pry bar to carefully remove any stubborn pieces, and sweep or vacuum the area to clear away dust and debris.
Step 2: Assess the Subfloor for Levelness
Now, take a level (a long one is best) and run it along the surface of your subfloor. Check for any high spots or dips. Mark these areas with a pencil so you can easily address them later. A good tip is to measure the high and low points across the entire floor to determine how much leveling is needed.
Step 3: Test for Moisture
If your subfloor is made of concrete, it’s essential to check for moisture. A simple moisture test using a plastic sheet can help determine if there’s excessive moisture underneath, which could damage your laminate. If moisture is present, you’ll need to address it before proceeding with the installation.
Once you’ve cleaned, assessed, and checked for moisture, you’ll be ready to move on to the next steps of leveling and installing your laminate floor!
Leveling Techniques: How to Fix an Uneven Subfloor
Now that you’ve cleaned and assessed your subfloor, it’s time to address those uneven spots. Fixing an uneven subfloor is crucial for ensuring your laminate flooring lays flat and lasts longer. Don’t worry; it’s easier than it sounds, and we’ve got you covered with simple, effective methods.
1. Using a Self-Leveling Compound
If you have significant dips or low spots, a self-leveling compound can help fill them in. This compound is easy to apply and smooths over your subfloor, creating a flat surface. First, mix the compound according to the instructions, and then pour it over the uneven areas.
Use a trowel or a spreader to help it flow evenly. Once applied, let it dry for the recommended time, and your subfloor will be as smooth as new.
2. Sanding Down High Spots
If your subfloor has high spots or bumps, you’ll want to smooth them out to create a level surface. For wood subfloors, you can use a belt sander or orbital sander to grind down the raised areas.
Take your time and check the level often to avoid sanding too much. Once done, sweep up the dust and clean the surface thoroughly.
3. Installing Plywood or OSB Sheets
For extremely uneven subfloors, installing a new layer of plywood or OSB (Oriented Strand Board) may be necessary. This technique provides a smooth, stable base for your laminate. Cut the boards to fit the floor, ensuring the seams are staggered to prevent gaps. Screw the boards into place and seal any edges where needed.
Installing Laminate Flooring Over a Leveled Subfloor
Now that your subfloor is clean, assessed, and leveled, it’s time to lay down your beautiful laminate flooring! Installing laminate over a leveled subfloor is a straightforward process, but it’s important to follow the right steps to ensure a perfect finish.
1. Choose the Right Underlayment
Before you start laying down the laminate, it’s crucial to choose the right underlayment. The underlayment provides cushioning, moisture protection, and soundproofing, all of which are important for laminate floors. Common options include foam, cork, or rubber.
Lay the underlayment down across the subfloor, making sure the seams are taped or sealed. This will create a smooth base for your laminate planks.
2. Acclimate the Laminate Flooring
Laminate flooring needs time to adjust to the room’s temperature and humidity. Let your laminate planks sit in the room for at least 48 hours before installation. This will prevent expansion or contraction once the floor is installed. Stack the planks in the middle of the room to allow airflow around them.
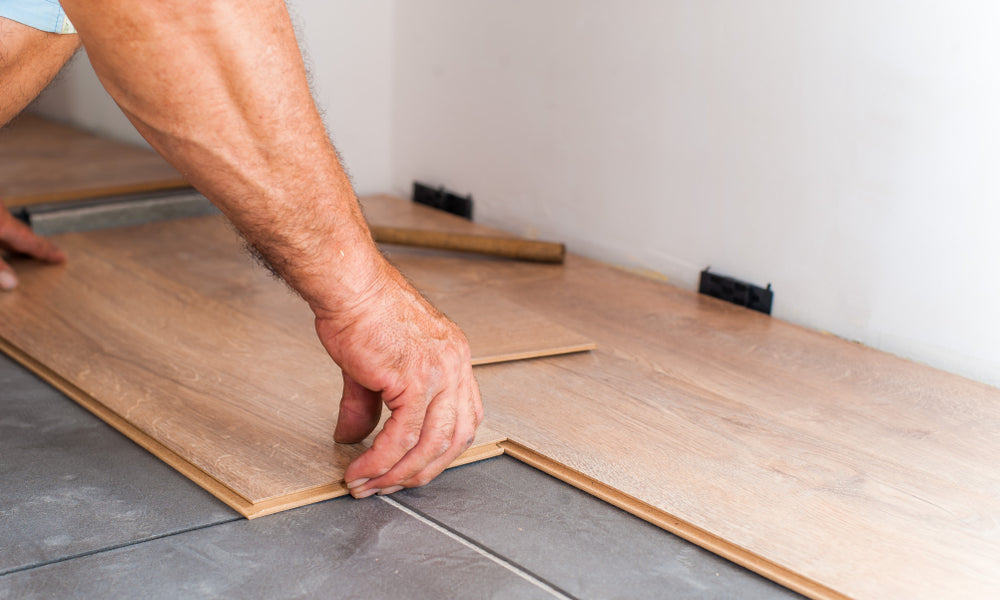
3. Start Laying the Laminate Planks
Now it’s time to start laying your laminate planks. Begin in one corner of the room, and lay the first row of planks with the tongue side facing the wall. Make sure to leave a small gap (around 1/8 inch) between the planks and the wall.
This gap is necessary for the laminate to expand and contract naturally with temperature changes. Continue laying the planks row by row, clicking them together using the tongue-and-groove system.
4. Stagger the Seams
For a more natural and sturdy look, stagger the seams of your laminate planks. This helps prevent any weak spots and adds visual appeal. Cut the last plank of each row to fit, and start the next row with the leftover piece from the previous one. This will help keep the seams from lining up directly with each other.
5. Install the Final Row and Trim
Once you’ve laid all the planks, the last row may need to be trimmed to fit. Measure the gap, and carefully cut the planks to size. Use a pull bar to lock the final row into place. Afterward, install baseboards or trim around the edges to cover the expansion gaps and give your floor a finished look.
Conclusion
Now that you know how to install laminate flooring on uneven subfloors, it’s time to tackle the project confidently. A little preparation and leveling can go a long way in achieving a perfect floor. So, roll up your sleeves, and soon you’ll be walking on a beautifully installed laminate floor.