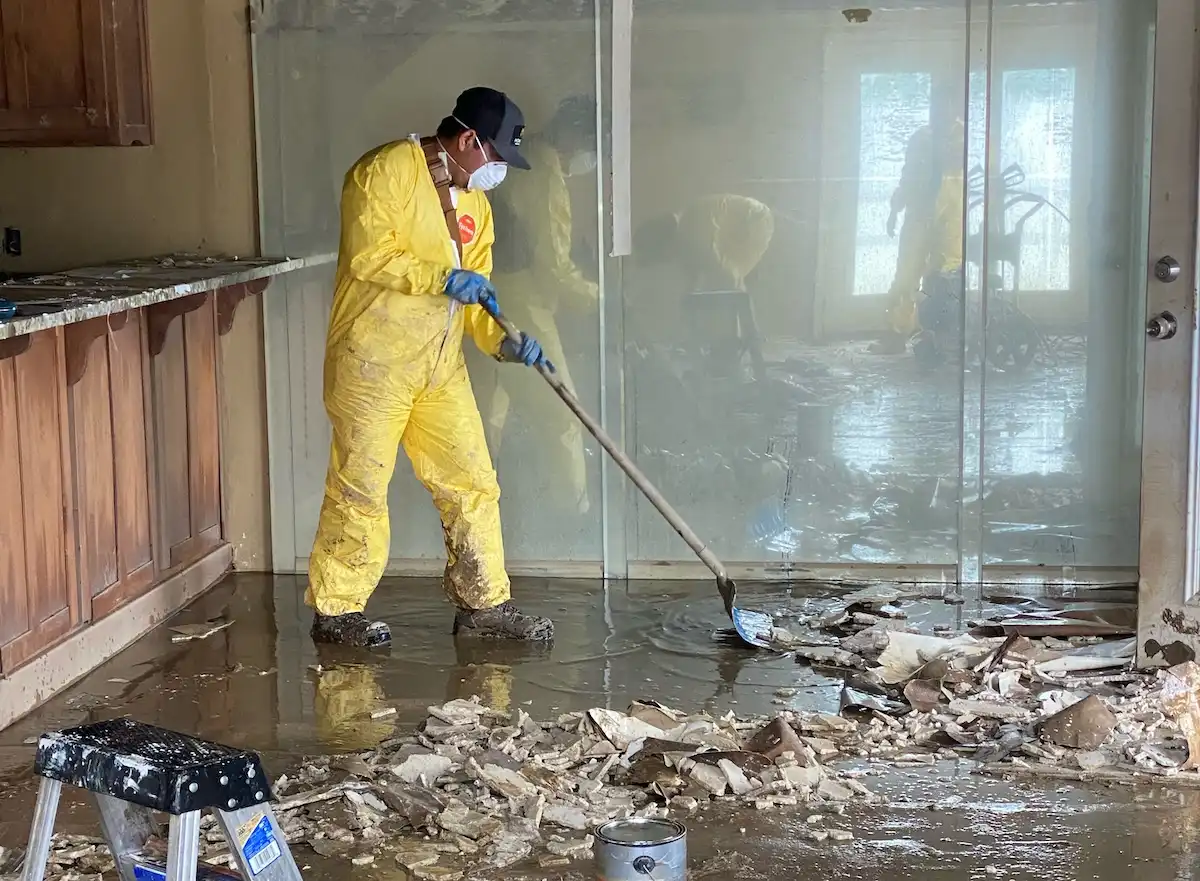
Finding your basement covered in water is never fun, but it happens to hundreds of homeowners every day.
Whether your sump pump failed during a rainstorm or you had a broken pipe during the winter, flooded basements can lead to thousands of dollars of damage if you don’t respond properly.
Follow these steps to clean up your flooded basement and prevent further damage.
Basement Flood Cleanup: Before You Start
Safety should be your primary concern before jumping into cleanup. Remember that water and electricity don’t mix. Before entering your basement, turn off the electricity to that portion of your home at the breaker box.
If you don’t know how to do this safely, call an electrician to come and shut it off before entering. Take note of any possible gas leaks by sniffing around the basement for unusual smells. Finally, protect yourself by wearing rubber boots and gloves when entering your basement.
If your basement floods due to a natural disaster or groundwater issues, it’s likely that the standing water isn’t clean. Floodwater often contains sewage, bacteria, mud, and who knows what else. Because of this, make every attempt to avoid floodwater until you know what you’re dealing with.
Step 1: Remove Standing Water ASAP
Time is of the essence when dealing with flood cleanup. Each hour that water sits increases the likelihood that it will seep into walls, flooring, and supporting structures. You want to begin removal within 24-to-48 hours if possible.
You have three options when it comes to removing standing water:
- Pump – If you have enough water to fill buckets, your best bet is to rent a small submersible pump. These can usually be rented from your local hardware store.
- Vacuum – Wet/dry vacuums are great for small-to-medium floods and help reach corners after you’ve removed the majority of the water.
- Buckets and Mops – If you only have a few inches of water, you could try mopping it up. However, this could take forever depending on how much you have.
Remove Floodwater Quickly to Prevent Mold
The longer you take to remove floodwater, the greater chance you’ll have rust, mold, and structural damage. Mold can start growing within 24-to-48 hours of water exposure, so time is of the essence.
Step 2: Discard Water-Damaged Materials
Once you’ve got most of the water out, start clearing away anything that got soaked. Wet carpeting, rugs, drywall, insulation, and even furniture will have to be removed.
Flooded drywall is nearly impossible to salvage as it absorbs a ridiculous amount of water. Even if it looks dry after cleanup, there could be mold growing inside that you can’t see. Prioritize ripping this out of your home ASAP.
Another thing to think about is whether it’s even worth saving. Carpeting exposed to flood water is almost never worth keeping. Water may contain sewage, chemicals, who knows what. It’s probably safer to rip it up than to try and clean it.
When ripping out materials, bag everything into heavy-duty contractor bags. Dispose of these bags as normal (or as instructed by local authorities). Materials that come in contact with flood water may be considered hazardous waste based on its contents.
Step 3: Dry Out Your Basement
Don’t be fooled – just because you’ve removed the water doesn’t mean your basement is dry. Inside walls, underneath flooring, and even inside your basement’s concrete slab can hide moisture. The best way to dry out your basement is with commercial equipment.
- Commercial Fans – Place floor-level fans along the walls so they blow across them. Regular household fans don’t cut it when trying to dry your home after a flood.
- Dehumidifiers – Just like fans, bring in a heavy-duty dehumidifier to soak up excess moisture in the air. You want one that is industrial-strength.
- Ventilation – If it’s warm and dry outside, go ahead and open up windows and doors to help cross-ventilate your basement. If it’s humid or cold, keep everything shut and use fans and dehumidifiers instead.
The reason you use fans and dehumidifiers at the same time is because they work well together. Air is pulled through your home by the fans and dehumidified as it travels across wet surfaces. Leave these on for at least 3-5 days for best results.
Step 4: Apply Anti-Microbial Solution
Okay, so now your basement is dry. But that doesn’t mean mold won’t grow. To prevent mold growth, apply an antimicrobial treatment to your walls, floors, and any structural wood members. Products that contain hydrogen peroxide or quaternary ammonium compounds are your best bet. These can usually be found online or in-home restoration supply stores.
Areas that held water the longest will need the most attention. If you have to rip out flooring or drywall, take extra care to apply solutions to these areas. With proper mold prevention, you can greatly reduce the chances of having to deal with mold after the fact.
Step 5: Inspect and Wait
This is probably the most important step that most homeowners skip. Before you go tearing out drywall and installing new flooring, wait at least a week. Use this time to monitor moisture levels in your basement. Installing new materials too early can trap moisture inside walls.
Use a moisture meter to ensure everything is dry. These simple tools allow you to measure the internal moisture levels of most materials. You can purchase one from your local hardware store or online.
If you’re still unsure, bring in a professional restoration company to inspect the damage. They have specialty tools like thermal imaging cameras that can detect hidden pockets of moisture.
Case Study: ”Slab Wicking” MythBusted Applied Residential Basements
University of Minnesota Extension specializes in cold-climate building science as well as flood recoveries.
“A guy pumped down 4” after his sump pump went out. He ran his household “fan guys” for 3 days until the floor was “dry” to the touch and started putting carpet back down.”
“The next WEEK came this overpowering “musty” smell. Once the carpet was pulled up, the concrete was wet and you could see mold had rooted into the backing of the carpet.”
What Happened: This is called capillary suction.Myth busted: Concrete is porous. Even if it’s dry to the touch there can be gallons of water in the “pores” of a slab or foundation wall. Without proper industrial dehumidification to create a “negative” vapor pressure between the slab and interior air that moisture will remain in the slab indefinitely until something like a carpet creates a greenhouse for mold growth to occur.
How’d it Work?: After ripping out the $3500 worth of carpet they had installed, proper hook-up of LGR (Low Grain Refrigerant) dehumidifiers for 5 days to “pull” that moisture out of the concrete, verified with a specialty impedance moisture meter (microns), and then covered back up
Working Link: Verified to work → https://extension.umn.edu/disaster-preparedness-and-recovery/cleaning-after-flood
FAQ’s:
Is the surface dry enough to start rebuilding?
Absolutely NOT. 2×4 studs, concrete slabs have a “latent” moisture content. Install drywall or carpet over wood that is still reading 20% and you just boxed in a mold factory. Invest in a moisture meter and make sure your building materials have dried back to what is known as “dry standard”(typically 8%-12% for wood)
Why do I need a LGR “Industrial” Sized dehumidifier? cant I just bring in my basement unit?
Your regular household dehumidifier is calibrated to keep your home comfortable. It is not designed to pull gallons of water out of structural timbers. An LGR- Low Grain Refrigerant dehumidifier can continue to extract water vapor from the air even after it feels dry to you. During a flood situation, you need to create that “negative” pull to extract the moisture from the concrete as well as the center of your wood beams.
Should I spray bleach to kill the mold?
Nope. Most Professional.restorers won’t touch bleach on porous surfaces anymore. Bleach is water. The chemicals that stay on the surface are chlorine. But the water molecules get absorbed into the wood. It actually feeds the mold roots (mycelium) on the inside. Pick up a quality antimicrobial or Botanical disinfectant like Benefect that is made to penetrate into the pores and kill the roots without adding moisture.
What’s a “Category 3” flood and why does it change everything?
Floods can be separated into categories depending on how contaminated the water is. Category 3, or Black Water as we call it in restoration contains contaminants that can make you very sick. Examples: sewage backups, rapidly rising river water. If your basement was affected by Category 3 water you CANNOT keep your carpet, pad, or may not be able to save your drywall. Anything porous needs to be cut out and thrown away. You can’t “sanitize” a sponge.
I’ve got water around my foundation, but how do I know if pumping is risky?
If you have feet of water in your basement and pump it out TOO fast while the ground water outside is still high you can create too much pressure on the outside of your basement walls. They can buckle in or even collapse. A good rule is to pump out about 1 foot of water per day to allow pressures to balance as the ground begins to dry out.
When to Get Professional Help
Some basement floods are too large for you to take care of alone. If your basement flood was more than two inches deep, if you suspect sewage backup, or if you think your home has sustained structural damage you should call in professionals. Companies like PID offer restoration services to get your home dried out properly and quickly.