Expert tips for maintaining your ductless system and improving indoor air quality
Your mini split system works tirelessly to keep your home comfortable, but without regular filter maintenance, its performance can decline by up to 25%. Whether you’re a first-time mini split owner or looking to optimize your existing system, understanding proper filter cleaning techniques is essential for maintaining peak efficiency, reducing energy costs, and ensuring healthy indoor air quality.
In this comprehensive guide, we’ll walk you through everything you need to know about cleaning mini split filters, from the basic cleaning process to advanced maintenance tips. Whether you own a Mitsubishi, Daikin, Fujitsu, or any other brand, these universal techniques will help you maintain optimal performance year-round.
Why Cleaning Mini Split Filters Is Critical for System Performance
Mini split air filters serve as the first line of defense against airborne contaminants, trapping dust, pollen, pet dander, and other particles before they circulate through your home. When these filters become clogged, the consequences extend far beyond reduced air quality.
The Hidden Costs of Neglected Filters
Energy Efficiency Decline: Dirty filters force your mini split system to work harder, consuming up to 15% more energy to achieve the same cooling or heating output. For the average household, this translates to an additional $150 to $300 in annual energy costs.
Reduced System Lifespan: When airflow is restricted by clogged filters, internal components experience increased stress. The compressor must work overtime, evaporator coils can freeze, and the blower motor faces excessive strain. This accelerated wear can shorten your system’s lifespan by 3-5 years.
Compromised Indoor Air Quality: Beyond efficiency concerns, dirty filters lose their ability to trap new contaminants effectively. This means allergens, bacteria, and mold spores can circulate freely through your living spaces, potentially triggering respiratory issues and allergies.
Ice Formation and Water Damage: Severely restricted airflow can cause the evaporator coils to freeze. When this ice melts, it can lead to water leakage, potentially damaging walls, ceilings, and flooring.
Pro Tip: Installing a smart thermostat with filter change reminders can help you stay on top of maintenance schedules. Comfort Temps recommends setting calendar alerts every two weeks during peak usage seasons to check your filters.
How Often Should You Clean Mini Split Filters?
The cleaning frequency for mini split filters isn’t one-size-fits-all. Several factors influence how often your filters need attention, and understanding these variables helps you establish an effective maintenance routine.
General Cleaning Schedule Guidelines
| Usage Level | Recommended Cleaning Frequency | Best For |
| Peak Season (Summer/Winter) | Every 2 weeks | Daily system operation, high usage environments |
| Moderate Use | Every 3-4 weeks | Mild weather, intermittent system use |
| Light Use | Every 6-8 weeks | Shoulder seasons, minimal operation |
| High-Dust Environments | Weekly inspection | Homes with pets, construction areas, dusty climates |
Environmental Factors That Increase Cleaning Needs
Pet Ownership: Homes with dogs or cats require more frequent filter cleaning, ideally every 1-2 weeks. Pet hair and dander accumulate rapidly, creating thick mat-like layers on filters that significantly restrict airflow.
Location and Air Quality: If you live near construction sites, agricultural areas, or regions with high pollen counts, increase your cleaning frequency by 50%. Urban environments with traffic pollution also warrant more frequent maintenance.
Allergy Sufferers: Households with allergy or asthma sufferers benefit from weekly filter checks. Clean filters ensure the system effectively removes airborne allergens rather than recirculating them.
Cooking Frequency: Homes with frequent cooking, especially activities that generate significant grease or smoke, should inspect filters weekly. Kitchen-adjacent mini splits require particular attention.
Warning Sign: If you notice reduced cooling/heating performance, unusual odors, or ice formation on your indoor unit, check your filters immediately regardless of when you last cleaned them.
Essential Tools and Materials for Filter Cleaning
Proper mini split filter maintenance requires minimal equipment, most of which you likely already have at home. Having these items ready before you start makes the process quick and efficient.
Basic Cleaning Kit
- Vacuum Cleaner with Brush Attachment: Essential for removing loose dust before washing. A handheld vacuum works perfectly for this task.
- Mild Dish Soap: Use a gentle, non-toxic soap. Avoid harsh chemicals that can degrade filter materials or leave residues that affect air quality.
- Lukewarm Water: Never use hot water, as it can warp plastic filter frames or damage electrostatic filter materials.
- Soft-Bristle Brush: An old toothbrush works excellently for stubborn dirt in filter mesh.
- Clean Microfiber Cloths: For wiping down the unit exterior and drying filters.
- Spray Bottle: Useful for applying cleaning solution evenly.
- Large Sink or Basin: For soaking and rinsing filters thoroughly.
Optional Professional-Grade Tools
- Mini Split Cleaning Bag: Specialized collection bags prevent water from damaging walls during deep cleaning of internal components.
- Coil Cleaner: No-rinse formulas designed specifically for evaporator coils when performing comprehensive maintenance.
- Filter Cleaning Spray: Enzymatic cleaners that break down organic matter and eliminate odors.
- Compressed Air Duster: For reaching tight spaces and dislodging stubborn debris.
Smart Shopping: Invest in a dedicated mini split cleaning kit if you have multiple units. Complete kits typically cost $30-50 and include specialized tools that make maintenance faster and more effective.
Step-by-Step Guide: How to Clean Mini Split Filters
Follow this detailed process to clean your mini split filters effectively while protecting your system components. The entire process takes approximately 20-30 minutes per unit, including drying time.
Step 1: Power Down the System
Safety First: Before touching any components, turn off your mini split system using the remote control or wall switch. For extra safety, especially if performing deep cleaning, switch off the circuit breaker that supplies power to the unit. This prevents accidental system activation and protects against electrical hazards.
Never attempt to clean filters while the system is running. The fan blades can cause injury, and moisture near electrical components creates shock risks.
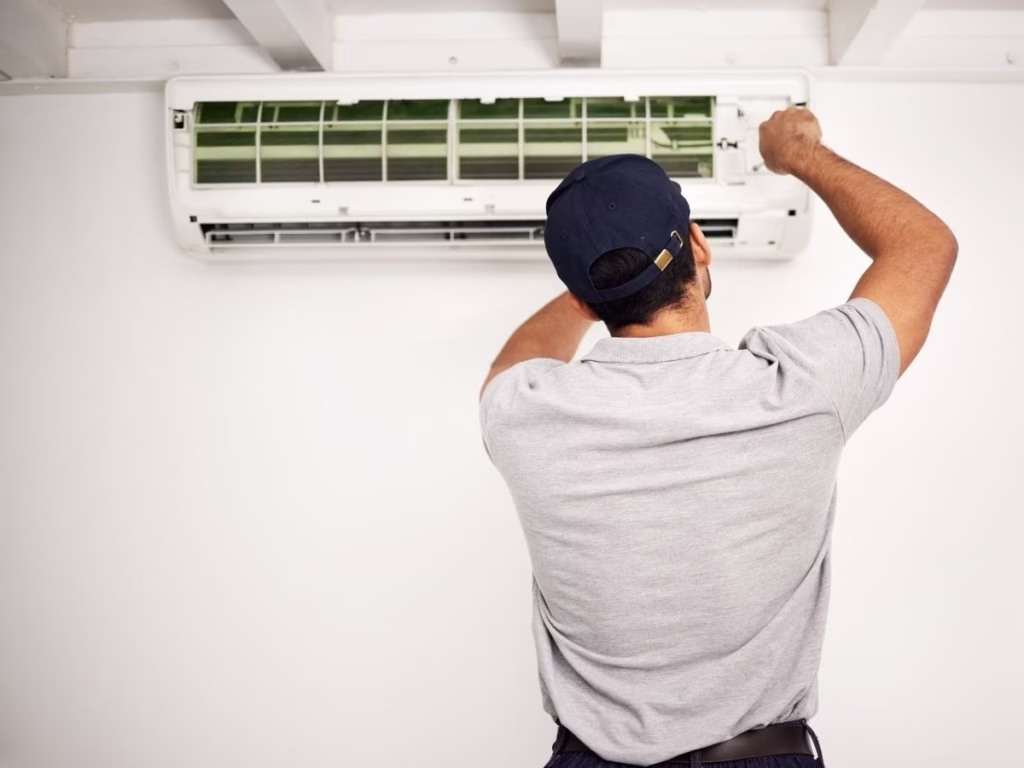
Step 2: Access the Filters
Most mini split indoor units feature a front panel that lifts upward or swings open. Locate the tabs or latches on either side of the panel these are typically near the bottom edge. Gently pull forward and lift the panel until it clicks into the open position or reaches its maximum opening angle.
Common Panel Types:
- Lift-Up Style: Panel pivots upward on hinges at the top. Support with one hand while accessing filters.
- Swing-Down Style: Panel opens downward like a cabinet door. May require pressing release buttons.
- Slide-Out Style: Less common; panel slides horizontally after releasing side clips.
Once the panel is open, you’ll see the air filters positioned horizontally across the front of the unit. Most mini splits have two mesh filters that work together.
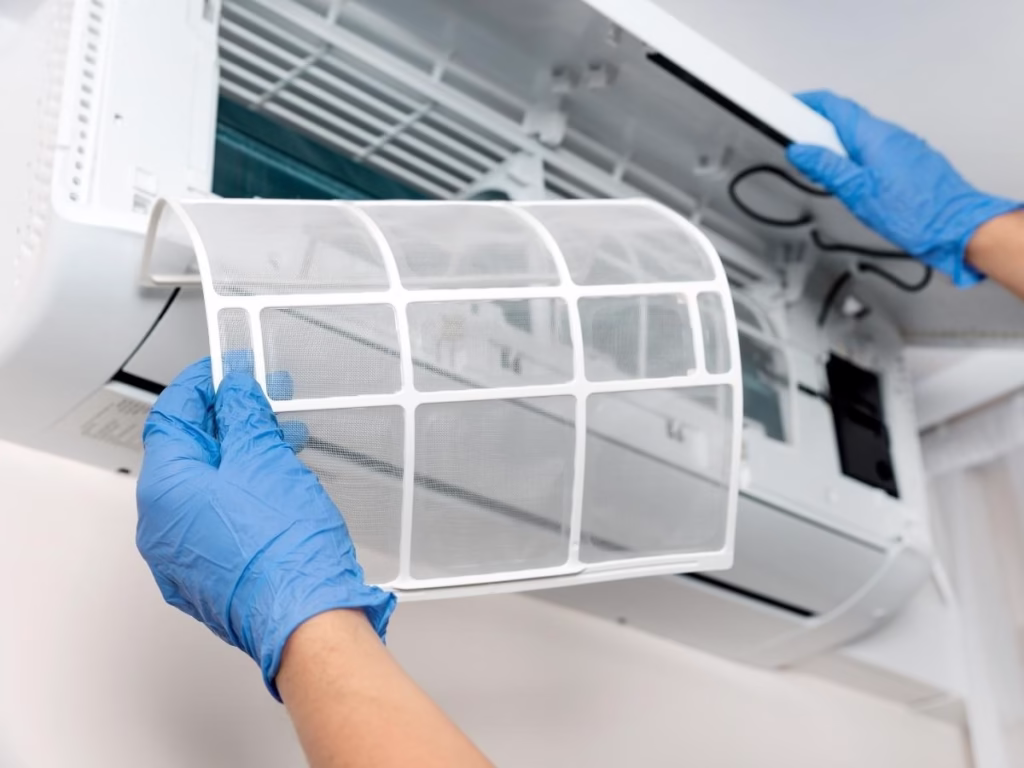
Step 3: Remove the Filters
Filters typically have small tabs or handles at their base. Grip these tabs and gently pull downward and outward in a smooth motion. The filters should slide out easily if you encounter resistance, check for additional clips or catches.
Handle with Care: While removing filters, hold them level to prevent accumulated dust from falling into the unit’s internal components. Consider placing a towel or cloth beneath the unit to catch any debris that falls.
Step 4: Preliminary Dust Removal
Take the filters outside or to a well-ventilated area. Using your vacuum cleaner with a brush attachment, vacuum both sides of each filter. Work in long, even strokes following the filter mesh pattern. This step removes the bulk of loose dust and reduces the amount of dirt that needs to be washed away.
Vacuuming Technique: Apply gentle pressure excessive force can damage the filter mesh. Pay special attention to the edges where dust tends to accumulate more heavily.
Step 5: Washing the Filters
Fill a large sink, bathtub, or basin with lukewarm water. Add a few drops of mild dish soap about 1 tablespoon per gallon of water. Submerge the filters completely and let them soak for 10-15 minutes. This soaking period allows the soapy water to penetrate and loosen embedded dirt.
The Washing Process:
- After soaking, gently agitate the filters in the water, working the soapy solution through the mesh.
- For stubborn spots, use a soft-bristle brush to gently scrub the filter surface. Work in circular motions, being careful not to tear the mesh.
- Rinse thoroughly under running lukewarm water. Start from the back side (the side facing the coils) and rinse forward, allowing dirt to flow away from the filter rather than through it.
- Continue rinsing until the water runs completely clear and no soap residue remains. Soap residue can attract more dirt and may create unpleasant odors when the system runs.
Stain Removal: For yellowed or stained filters, create a solution of equal parts white vinegar and water. Soak the filters for 20 minutes, then proceed with normal washing. Vinegar naturally disinfects while breaking down organic stains.
Step 6: Thorough Drying
This is the most critical step many homeowners rush installing damp filters can lead to mold growth and system damage.
Drying Methods:
- Air Drying (Recommended): Shake off excess water and stand the filters upright in a well-ventilated area or outdoors in the shade. Never expose filters to direct sunlight, as UV rays can degrade the mesh material. Allow 2-3 hours for complete drying in normal conditions.
- Accelerated Drying: Place filters near a fan (not a heater) for faster drying. A box fan works excellently position filters 2-3 feet away and allow 45-60 minutes.
- Verify Dryness: Before reinstalling, feel all parts of the filter, especially the edges and corners where water tends to pool. Filters must be completely dry to the touch.
Critical Warning: NEVER reinstall wet or damp filters. Even slight moisture provides the perfect environment for mold and mildew growth, which can quickly spread throughout your ductless system and compromise indoor air quality.
Step 7: Clean the Unit Interior (While Filters Dry)
With filters removed and drying, use this time to maintain the mini split’s interior components:
- Interior Cover: Wipe the inside of the front panel with a damp microfiber cloth to remove dust accumulation.
- Intake Grille: Clean the grille area where filters sit using a vacuum or damp cloth.
- Visible Coils: Very gently wipe any accessible portions of the evaporator coils with a soft, dry cloth. Avoid bending the delicate fins.
- Exterior Surface: Clean the unit’s outer casing with a slightly damp cloth and mild soap solution.
Step 8: Reinstall the Filters
Once completely dry, reinstall the filters in reverse order of removal:
- Align the filters with the guide rails inside the unit.
- Slide them upward and inward until you hear or feel them click into place.
- Ensure filters are seated evenly and completely gaps allow unfiltered air to bypass the system.
- Close the front panel, ensuring it latches securely.
Step 9: Power Up and Test
Restore power to the unit and turn it on. Listen for any unusual sounds and verify that air flows normally from the vents. The system should operate more quietly and efficiently with clean filters.
Performance Check: Within the first 10-15 minutes of operation, you should notice improved airflow. Place your hand near the vents air output should feel noticeably stronger than before cleaning.
Deep Cleaning vs. Regular Maintenance: What’s the Difference?
Regular filter cleaning the process described above handles routine dust and debris. However, mini split systems also benefit from periodic deep cleaning to maintain long-term efficiency and prevent internal contamination.
When to Consider Deep Cleaning
Schedule professional deep cleaning or perform advanced DIY cleaning when you notice:
- Musty or moldy odors when the system runs
- Visible mold or dark discoloration on internal components
- Water leaking from the indoor unit
- Ice formation on coils during cooling mode
- Persistent performance issues despite clean filters
- It’s been more than 12 months since the last deep cleaning
Advanced Cleaning Components
Evaporator Coils: These aluminum fins behind the filters accumulate dust, mold, and debris over time. Professional cleaning involves applying specialized coil cleaner and rinsing with low-pressure water while using a collection bag to protect your walls.
Blower Wheel: The cylindrical fan that moves air through the system can accumulate a thick layer of dust and grime. Cleaning requires partial disassembly and careful brushing or pressure washing of the wheel.
Drain Line: The condensate drain line can become clogged with algae and slime. Flushing with a vinegar solution or specialized drain cleaner prevents water backup and overflow.
Outdoor Unit: The condenser unit outside should be cleared of debris, leaves, and dirt. Gently rinse the coils with a garden hose (never a pressure washer) to maintain heat exchange efficiency.
DIY Deep Cleaning Safety Considerations
While regular filter cleaning is straightforward, deep cleaning internal components involves risks:
- Electrical shock from improper power disconnection
- Damage to delicate coil fins and electronic components
- Water damage to walls and electrical systems
- Refrigerant line punctures if handled carelessly
- Voiding manufacturer warranties through improper maintenance
For comprehensive internal cleaning, many homeowners choose professional service. HVAC technicians have specialized tools, including mini split cleaning bags, appropriate pressure equipment, and expertise to clean thoroughly while protecting your system and home.
Expert Recommendation: According to leading HVAC specialists, professional deep cleaning should be performed annually, while homeowners handle bi-weekly filter maintenance. This combination ensures optimal performance without voiding warranties or risking DIY damage.
7 Common Mini Split Filter Cleaning Mistakes to Avoid
Even with the best intentions, homeowners often make mistakes that can damage their mini split systems or reduce cleaning effectiveness. Here’s what to avoid:
1. Using Hot Water or Harsh Chemicals
The Problem: Hot water can warp plastic filter frames and damage electrostatic filter materials. Bleach, ammonia, and other harsh cleaners degrade the mesh and leave chemical residues that affect indoor air quality.
The Solution: Stick to lukewarm water (around 70-80°F) and mild dish soap. For disinfection, use white vinegar diluted with water.
2. Reinstalling Damp Filters
The Problem: This is the most common and potentially damaging mistake. Even slightly damp filters create the perfect environment for mold and bacterial growth.
The Solution: Allow minimum 2-3 hours for complete air drying. Verify dryness by feeling every part of the filter, especially corners and frame edges.
3. Excessive Scrubbing Force
The Problem: Aggressive scrubbing can tear filter mesh, creating gaps that allow unfiltered air and debris into the system.
The Solution: Use gentle circular motions with a soft brush. If dirt doesn’t come off easily, extend the soaking time rather than increasing scrubbing force.
4. Cleaning Filters While System Runs
The Problem: Operating the mini split without filters causes dust and debris to accumulate directly on the evaporator coils, reducing efficiency and potentially causing damage.
The Solution: Always turn off the system before removing filters. If you need cooling/heating while filters dry, use an alternate climate control source.
5. Ignoring Manufacturer Guidelines
The Problem: Some mini split filters have special coatings or materials requiring specific cleaning methods. Generic approaches can damage these specialized filters.
The Solution: Consult your owner’s manual for brand-specific instructions. Some filters are disposable rather than washable check before attempting to clean.
6. Skipping the Vacuum Step
The Problem: Washing heavily dust-laden filters without pre-vacuuming creates muddy water that’s harder to rinse clean and can clog sink drains.
The Solution: Always vacuum filters thoroughly before washing. This removes 70-80% of accumulated dust and makes washing more effective.
7. Forgetting to Clean Surrounding Areas
The Problem: Cleaning filters while ignoring dust on the unit housing, intake grilles, and nearby surfaces means contaminants quickly redeposit on clean filters.
The Solution: While filters dry, wipe down all accessible surfaces of the indoor unit and the surrounding wall area.
Money-Saving Tip: Proper filter maintenance can reduce your cooling and heating costs by 10-15%. For the average household, this translates to $150-300 in annual savings far exceeding the minimal time and effort required for regular cleaning.
Troubleshooting Common Mini Split Filter Issues
Even with regular cleaning, you may encounter filter-related problems. Here’s how to identify and resolve common issues:
Filter Won’t Come Out or Fit Back In
Symptom: Filter appears stuck or won’t slide into place during reinstallation.
Causes: Warped filter frame (from hot water or sun exposure), accumulated debris in guide rails, or incorrect insertion angle.
Solution: Check guide rails for obstructions. Ensure you’re inserting filters at the correct angle they typically need to be tilted slightly inward before sliding up. If the frame is warped, the filter needs replacement.
Persistent Musty Odors After Cleaning
Symptom: Unpleasant smell continues even after thorough filter cleaning.
Causes: Mold growth on evaporator coils, contaminated drain pan, or bacterial buildup in the blower wheel.
Solution: The problem extends beyond the filters. The internal components need professional deep cleaning. In the interim, run the fan-only mode for 30 minutes after each cooling cycle to dry moisture and inhibit mold growth.
Reduced Airflow Despite Clean Filters
Symptom: Air output remains weak even immediately after filter cleaning.
Causes: Clogged evaporator coils, restricted outdoor unit airflow, refrigerant issues, or blower wheel obstruction.
Solution: Check the outdoor unit for debris blocking airflow. If exterior is clear, internal components need inspection. This typically requires professional service.
Water Leaking from Indoor Unit
Symptom: Water drips from the indoor unit during operation.
Causes: Clogged condensate drain line, frozen evaporator coils (often from dirty filters), or improper unit installation.
Solution: Clean filters thoroughly and ensure they’re properly installed. Flush the drain line with a vinegar-water solution. If leaking persists, professional service is needed to check refrigerant levels and drain line routing.
Filters Show Heavy Discoloration or Staining
Symptom: Filters have brown, yellow, or dark stains that don’t wash away.
Causes: Tobacco smoke, cooking oils, high humidity environments, or age-related material degradation.
Solution: Try the vinegar soak method for organic stains. However, heavily stained filters that don’t come clean should be replaced they’ve likely lost filtration effectiveness.
Ice Formation on Coils
Symptom: Frost or ice visible on the evaporator coils behind the filters.
Causes: Severely restricted airflow from dirty filters, low refrigerant levels, or operating in very cold conditions.
Solution: Turn off the system and allow ice to melt completely. Clean filters thoroughly and ensure proper installation. If ice returns after filter cleaning, refrigerant may be low contact a technician.
When to Call a Professional for Mini Split Maintenance
While regular filter cleaning is a perfect DIY task, certain situations require professional expertise. Understanding when to call an HVAC technician protects your investment and ensures safety.
Signs You Need Professional Service
- Persistent Performance Issues: If cleaning filters doesn’t resolve reduced cooling/heating capacity, the problem likely involves refrigerant, compressor, or other internal components.
- Electrical Problems: Tripped breakers, burnt smells, sparking, or flickering lights when the unit operates indicate electrical issues requiring immediate professional attention.
- Refrigerant Leaks: Hissing sounds, ice on refrigerant lines, or oily residue near connections suggest refrigerant leaks. Only licensed technicians can safely handle refrigerant.
- Unusual Noises: Grinding, rattling, or squealing sounds beyond normal operation indicate mechanical problems with the fan motor, compressor, or other components.
- System Won’t Turn On: If your mini split doesn’t respond to controls after basic troubleshooting (checking power, resetting breakers, replacing remote batteries), professional diagnosis is needed.
- Water Damage: Extensive water leaking causing ceiling or wall damage requires professional assessment of drain lines, installation angle, and internal components.
Annual Professional Maintenance Benefits
Even when your system seems to work perfectly, annual professional servicing provides value:
- Comprehensive inspection of electrical connections and components
- Refrigerant level verification and adjustment
- Deep cleaning of evaporator and condenser coils
- Blower wheel cleaning and lubrication
- Condensate drain line flushing and testing
- Temperature differential measurement to verify proper operation
- Warranty protection many manufacturers require professional servicing to maintain coverage
What to Expect from Professional Service
Professional mini split maintenance typically takes 1-2 hours per unit and includes:
- Visual Inspection: Technician examines all components for wear, damage, or deterioration.
- Filter Cleaning/Replacement: Professional cleaning or new filter installation.
- Internal Cleaning: Deep cleaning of coils, blower wheel, and drain system using specialized equipment.
- Refrigerant Check: Verification of proper refrigerant charge and pressure readings.
- Electrical Testing: Measurement of voltage, amperage, and electrical connections.
- Performance Testing: Temperature and airflow measurements to verify optimal operation.
- Outdoor Unit Service: Cleaning and inspection of the condenser unit.
Professional service typically costs $100-250 per unit annually an excellent investment considering the extended system lifespan and maintained efficiency.
Frequently Asked Questions About Mini Split Filter Cleaning
Q: Can I run my mini split without filters?
A: Never operate a mini split without filters, even briefly. Filters protect the evaporator coils from dust accumulation. Running without filters allows contaminants to coat the coils, reducing efficiency significantly and potentially causing permanent damage. If you need climate control while filters dry, use an alternative heating/cooling source.
Q: How do I know when filters need replacing rather than cleaning?
A: Replace filters when you notice tears or holes in the mesh, persistent discoloration that doesn’t wash away, warped frames that don’t fit properly, or if filters are more than 3-5 years old. Additionally, if you can see light through areas that were previously opaque, the mesh has degraded and needs replacement.
Q: Are all mini split filters washable?
A: Most standard mesh filters are washable and reusable. However, some advanced filters particularly those with activated carbon, HEPA materials, or specialized coatings may be disposable. Check your owner’s manual or filter labeling for specific instructions. When in doubt, contact the manufacturer.
Q: Can I use a dishwasher to clean mini split filters?
A: While technically possible, dishwashers are not recommended. The high water temperature can warp plastic frames, and harsh dishwasher detergents may damage filter materials or leave residues. Hand washing with mild soap provides better results and protects filter integrity.
Q: What’s the best cleaning solution for heavily soiled filters?
A: For standard cleaning, mild dish soap works excellently. For heavily soiled or stained filters, soak them in a 50/50 mixture of white vinegar and warm water for 20-30 minutes before washing. Vinegar naturally breaks down organic matter, eliminates odors, and disinfects without harsh chemicals.
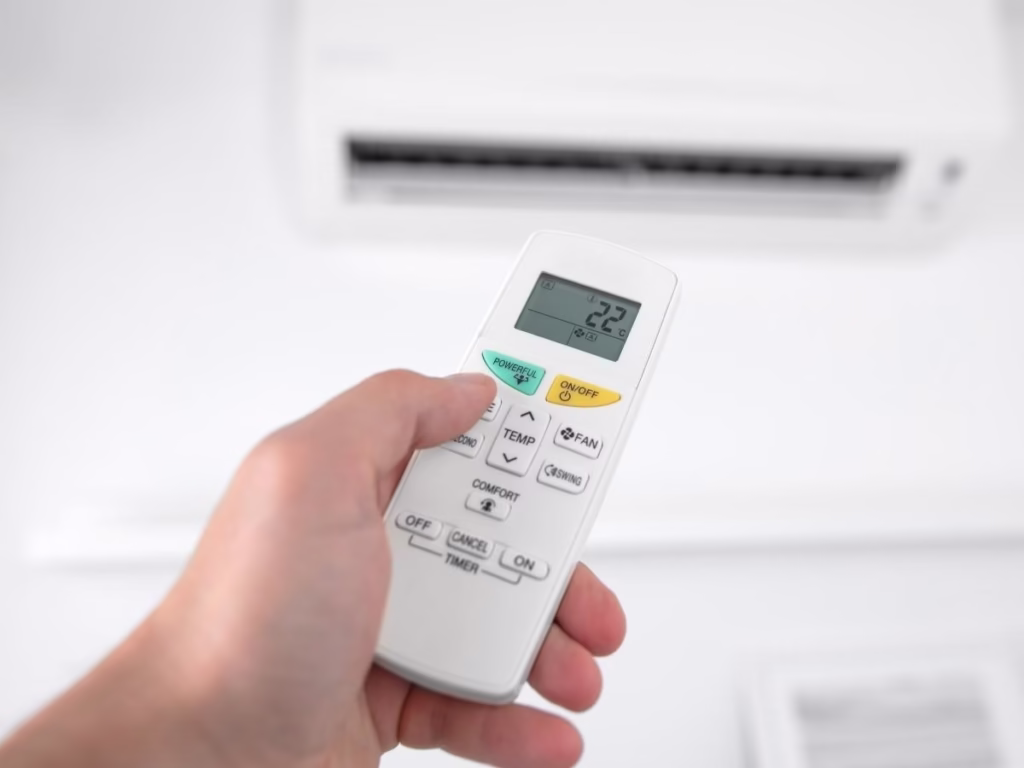
Q: My mini split has a “filter clean” indicator light. When should I clean based on this?
A: Filter indicator lights typically activate after a preset number of operating hours (often 250-300 hours). While helpful, these timers don’t account for environmental factors. Use the indicator as a reminder, but also perform visual inspections more frequently in high-dust environments or during peak usage seasons.
Q: Can dirty filters cause my mini split to freeze up?
A: Yes, severely restricted airflow from clogged filters is a primary cause of evaporator coil freezing. When airflow decreases, the coil temperature drops below freezing, causing ice formation. This ice further blocks airflow, creating a destructive cycle. If you notice ice, turn off the system, clean filters thoroughly, and allow complete melting before restarting.
Q: How much does professional mini split maintenance cost?
A: Professional maintenance typically ranges from $100-250 per unit for annual service. This includes filter cleaning, coil cleaning, refrigerant checks, and comprehensive system inspection. While DIY filter maintenance is free (except for supplies), annual professional service is recommended for warranty compliance and catching potential issues early.
Q: Do mini split filters help with COVID-19 and other viruses?
A: Standard mini split filters primarily capture larger particles like dust, pollen, and pet dander. While they provide some protection against airborne particles, standard filters don’t effectively capture viruses. For enhanced viral protection, consider upgrading to HEPA filters (if compatible with your system) or adding a standalone air purifier. Maintaining clean filters ensures optimal air circulation, which is beneficial for overall indoor air quality.
Q: Can I vacuum filters instead of washing them?
A: Vacuuming alone is acceptable for quick maintenance between washings, but it doesn’t remove oils, fine dust particles, or biological contaminants. For thorough cleaning, combine vacuuming (to remove loose debris) with washing (to deep clean and disinfect). In peak season, vacuum weekly and wash every 2-3 weeks for optimal results.
Maintaining Peak Performance Through Regular Filter Care
Cleaning your mini split filters is one of the simplest yet most impactful maintenance tasks you can perform. This 20-minute routine every few weeks ensures optimal energy efficiency, extends your system’s lifespan, and maintains healthy indoor air quality for your family.
Remember the key principles: clean filters every 2-4 weeks during heavy use, always let filters dry completely before reinstalling, use gentle cleaning methods with mild soap, and schedule annual professional service for comprehensive maintenance.
By following the techniques outlined in this guide, you’re not just maintaining an HVAC system you’re protecting a significant home investment while ensuring comfortable, efficient, and healthy indoor climate control year-round.
For expert guidance on selecting reliable mini split brands and systems that prioritize easy maintenance, Comfort Temps offers comprehensive reviews and professional recommendations. Their expertise helps homeowners make informed decisions about mini split selection, installation, and ongoing care.
About the Author
This comprehensive guide was researched and compiled by the HVAC specialists at DGM News in collaboration with industry experts. For more HVAC tips, maintenance guides, and product reviews, connect with the Comfort Temps team on social media:
- About.me
Additional Resources
- Best Mini Split Brands: Expert Analysis and Top Recommendations